
Kinetix Helpdesk Portal for Slack
Overview
Everyone hates browser-based chat services, but everyone (who uses it) loves Slack. Kinetix Slack Support allows you to stay in the soothing comfort of Slack while our experts solve your tech woes. If your organization uses Slack but has not set up Slack Support, please email us at help@kinetix.com.
For our clients still using the legacy /ithelp! slash command, please see the instructions found here.
Summary
/ithelp or /help! to open a new Help Request
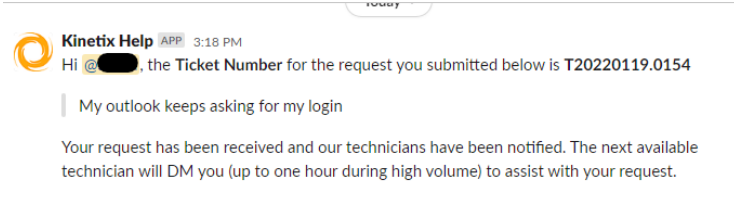
Requests set to Urgent between 6am and 6pm Pacific will receive a direct-message response within an hour (usually from Kinetix Admin or Kinetix Technician accounts)
Requests set to Non-Urgent will receive an email response within 24 hours.
Requests submitted after-hours will receive a response next-business-day.
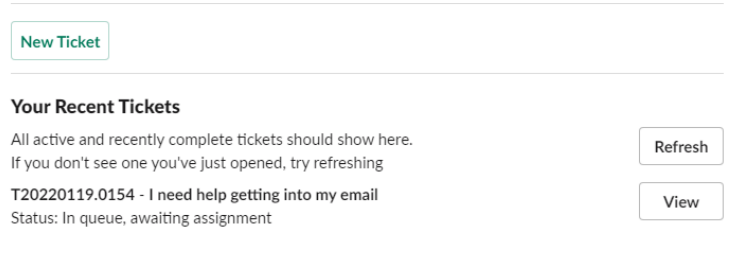
The Home tab displays active and recent tickets.
The Messages tab is for ticket-related notifications.
The messages tab is not monitored, and we will not see anything you write there.
First Time Setup
To find the Helpdesk Portal app, you can either open the app catalogue from the More menu in the left pane of your Slack app, or scroll all the way to the bottom of the pain and click on “Add apps” in the Apps section. Then you can search for “Kinetix Help Portal” - click the tile to open your Home tab. The first time you open the app it may take up to 10 seconds to initialize your profile. All subsequent openings should be near instant.

Home Tab

The Home tab is the hub of your helpdesk activity. Here you can view your currently open and recently closed tickets, as well as open new help requests. All tickets you are a contact on will show up here, even ones you didn’t open via Slack! Your Home tab will update periodically while it’s open, but if you don’t see a ticket you opened recently, you can use the ‘Refresh’ button, switch tabs, or switch to another channel and then open the app again.
New tickets will show with a Bolded title.
Canceled tickets with show with a strikethrough title.
Opening a new Help Request
To open a new request, click on the New Ticket button on your Home tab, or use the /help! or /ithelp command in any channel. Both will open the New Help Request form.
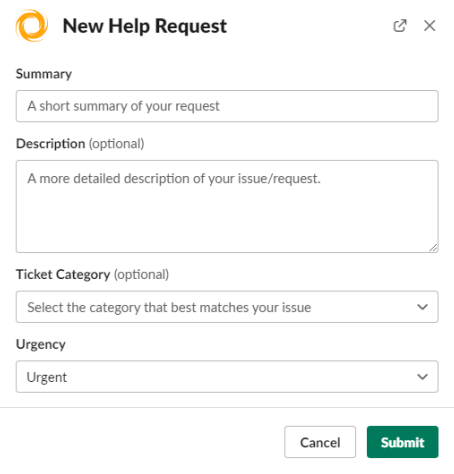
As seen above, there are 4 parts:
Summary – This is what our technicians will see first when the request comes into the alert queue.
Description – All the nitty gritty details of your request. This can be as long as you like, so don’t be hold back! The more details you provide, the easier it is for us to help you. a. Tip: You can expand this field by dragging the lower right corner of the text box.
Category – What does your request fall under? If you don’t see an option that fits your request, you can leave this blank. We can always change it later.
Urgency – How urgent is your request? If you need help ASAP, leave this set to ‘Urgent’ (the default). If your request is not urgent, you can change this to ‘Non-Urgent’ - your request will be treated like an email request (response within 24 hours). When you’re ready, click Submit. You will see a small window confirming your request has been sent to the system.
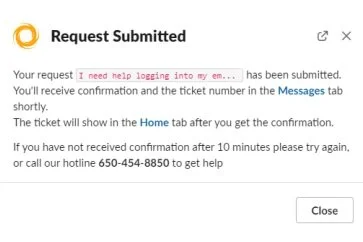
Shortly thereafter, a few things will happen:
(If set to Urgent and within our business hours 6am-6pm PST) - An alert will enter our Responsive Support queue, and a technician will pick it up when available.
You’ll receive a confirmation response in the Messages tab with the summary of your request and the Ticket Number.
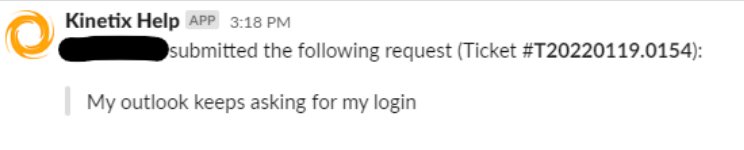
(If configured) - A confirmation response will be posted to the designated Public Confirmation channel – this may or may not be enabled in your Slack workspace depending on your administrator’s preferences.
Your Home tab should update to show the new ticket. If you submitted during business hours, the ticket status will show ‘In queue, awaiting assignment’. If you submit out of business hours, or submit a non-urgent request, the status will be ‘Awaiting assignment’.
Viewing Tickets
To view a ticket, simply click on the appropriate ‘View’ button on your Home tab. A window will open with the ticket information.
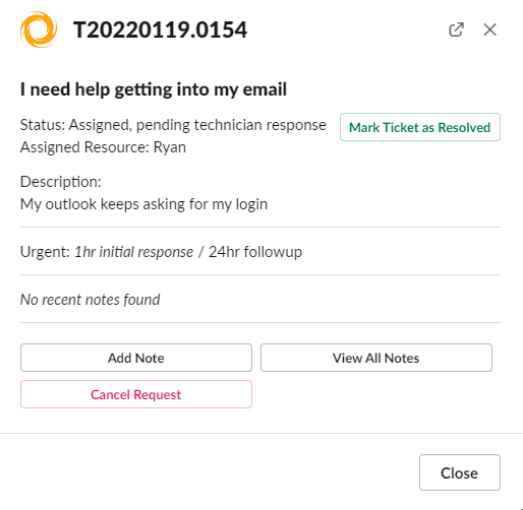
The view window will show all the current details of your ticket including
Status
Assigned Resource/Technician
Request Description
The SLA (response times)
The last 3 ticket notes.
You have several buttons available in this window.
Mark Ticket as Resolved – Closes the ticket, marking it as complete. A system note will be added indicating you’ve closed your ticket a. If the technician is awaiting your permission to close the request, this button will show as “Mark ticket complete?”
Add Note – Allows you to add a new ticket note to the ticket, just as if you replied to the ticket email thread.
If the ticket is completed or canceled, the Add Note button will be replaced by Re-open Ticket.
View All Notes – Displays all past notes for the ticket.
Cancel Request – Figured out how to solve your issue before a technician has responded? You may cancel your request if no work has been done yet.
Dismiss - (When the ticket is complete or canceled) - Hides the ticket from your Home tab. Currently this cannot be undone, so make sure you’re done with the ticket!